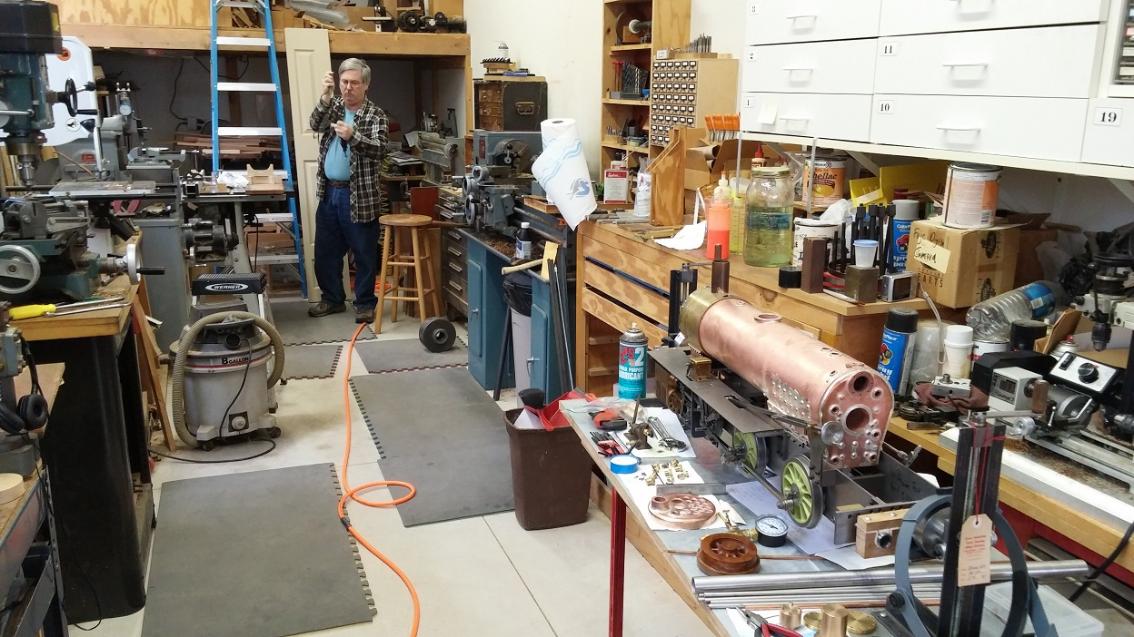
Tools Required & Some, not so "Required"
This shop has taken me about 30 years to collect all of the tools. I did not buy all of these at one time, this would not be possible! I also show some of my more significant tools and methods of organizing things.
You will probably notice that I have no digital read outs on any of my machines. This costs more, and if you can afford it, go for it. I would rather spend the money on more tooling for what I already have. Without a DRO on anything, sometimes the work must be carefully planned especially on the mill. I frequently use dial indicators with magnetic bases when I need to establish a certain feed point on a job. I also have no problem reading the graduations on the hand wheels.
The lathe, in combination with a milling machine, will allow you to make almost anything. I will describe my lathe and mill before the other machines. These are the most important machines, and tools should be collected based on these two.
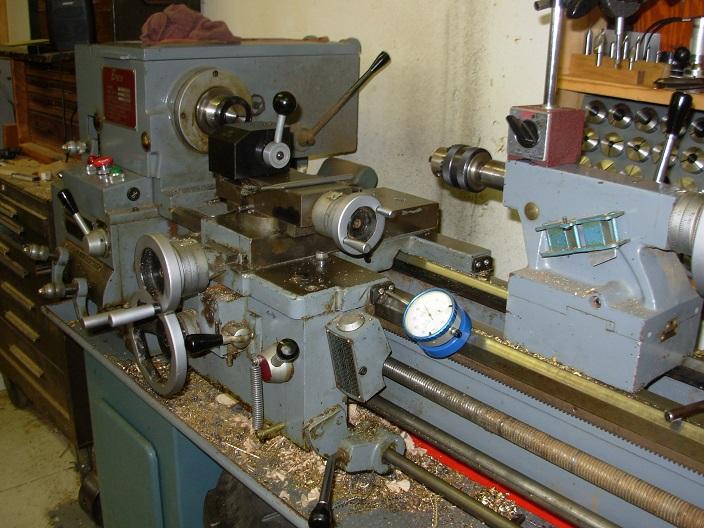
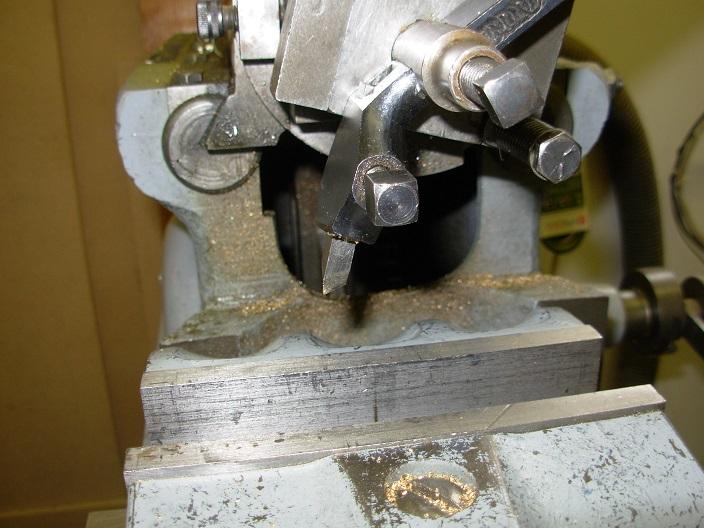
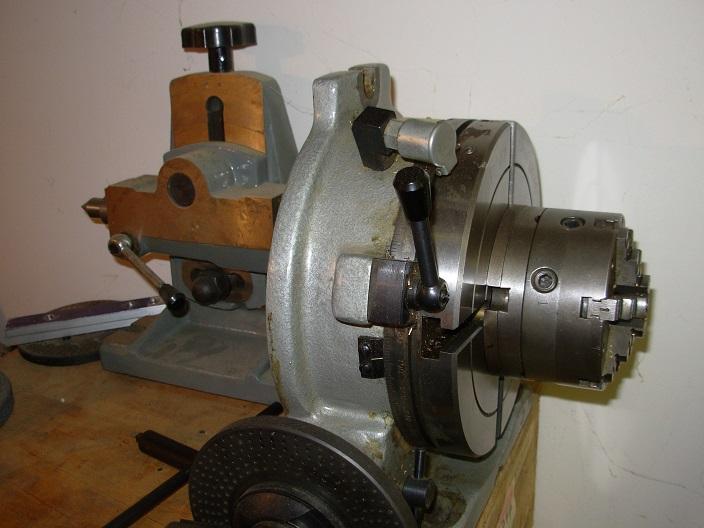
This lathe is an Enco, made in China. It was the best I could afford at the time and has served me well. It has a belt drive and does not have a fully geared head. It does have a quick change gear box and will cut any thread I need and can be set up to cut metric threads if needed. I have single point cut many threads in this lathe and is a pleasure to do so. In the photo, it is set up with a 5C collet adapter in the head stock. It will swing 11" over the front end of the carriage and is about 30" between centers. Over the carriage, it will swing 7". The hole in the spindle is large, it is just slightly over 1.4". It is a gap bed lathe and will swing about 16" in diameter through the gap. I have never removed the gap, and hopefully never will have occasion to. I have a quick change KDK tool post for it and several tool holders for the post.
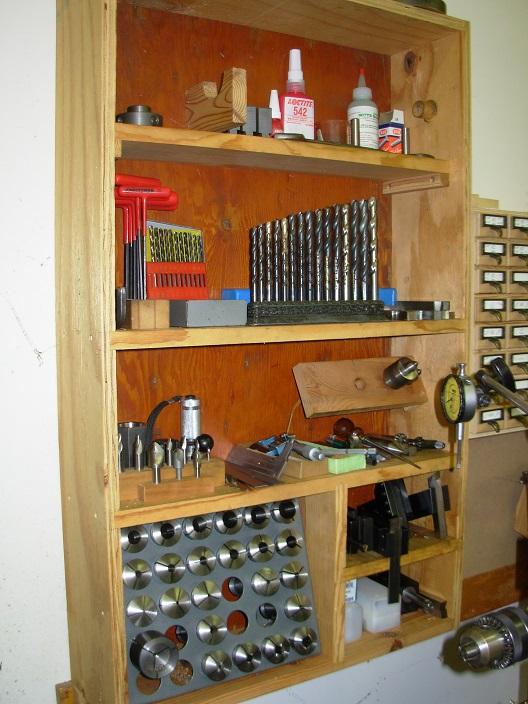
Directly behind the lathe, is a shelf for the lathe tooling. On the bottom is a rack for the 5C collets and to the right of the rack are the tool holders for the quick change tool post. Going upwards, are different sizes of center drills, 1" to 6" scales and a 1" micrometer. The 1" mic gets used so much, that is always within reach, all my other mics are in wooden boxes in a tool box. To the right of the scales and mic are marking tools including felt tip markers and a scratch awl. Above that is a little rack for the drill chuck and both live and dead centers. The next to the top shelf, has a drill index for numbered drills and a stand for fractional drills. Also several hex wrenches for adjusting and setting the quick change tool holders. The top shelf has a holder for the collet draw bar, it's currently in the lathe. The top shelf also has lesser used items such as Loctite and and the outside jaws for the 3 jaw lathe chuck.
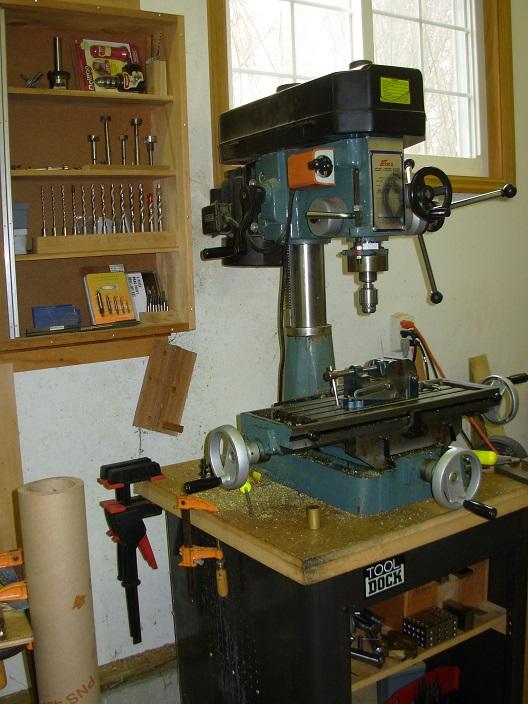
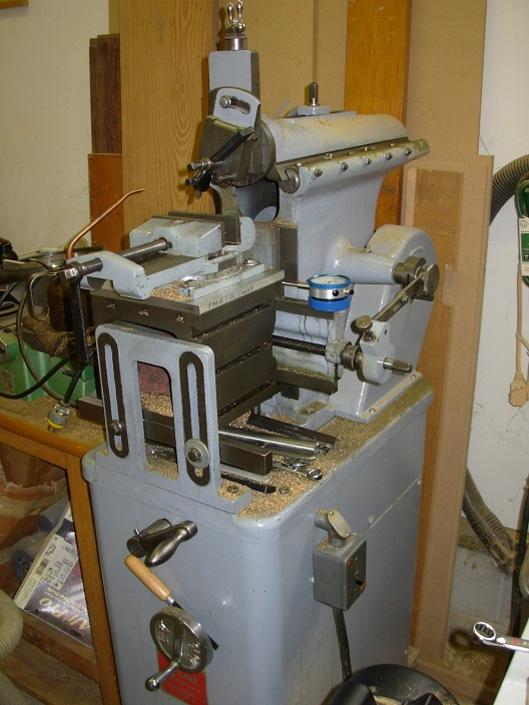
My mill, like my lathe, is an Enco, made in China. It too, was the best I could afford at the time. The lathe and the mill were purchased when I was in my twenties and were my first serious machine tools. The table is 7-1/2" by 23". The spindle uses R8 collet tooling. The cabinet/base of the machine holds the collets, milling cutters, parallels and clamping kit. Behind, and to the left of the mill, is a cabinet for more tooling which includes mostly items that drill holes. I have several sets of numbered, fractional and lettered drills. My boring head is also there along with several special center drills and a set of brad point drills specifically for drilling wood. It is not a knee mill, but, has a good system for moving the quill in the Z axis accurately.
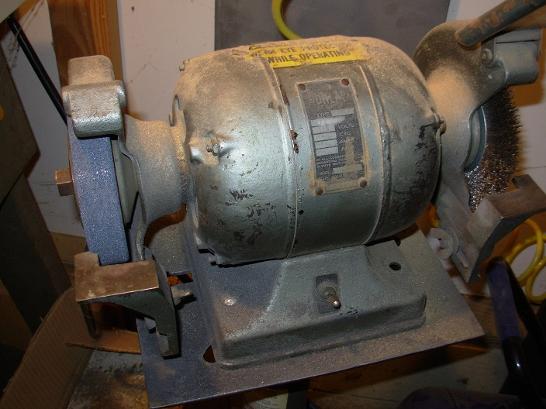
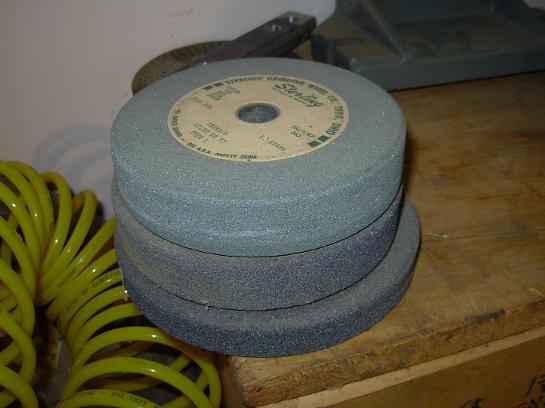
Here's my grinder for sharpening tools for the lathe. If you use high speed tooling, you will need someway to sharpen them. I have several wheels for use on the grinder, including a "green" wheel that will allow me to sharpen brazed carbide tools. Carbide will keep an edge better than HSS on things like cast iron. The other side of the grinder has a wire wheel for cleaning things. I change these wheels frequently depending on what I am doing. If you have the space, a grinder for each type of wheel would be nice.
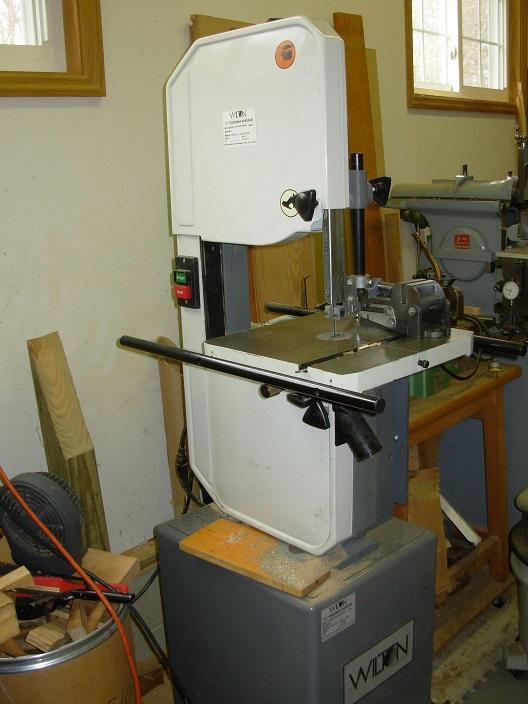
My band saw is fairly new and replaced an older wood cutting only, band saw. This is a Wilton 14" band saw that will cut wood, or metal. It has a special gear box for slowing the saw for metal cutting. It has 8 speeds. I have it set up so I can switch between the high and low speeds quickly. I use it as my cutoff saw and everything else. It's a great saw.
This is my shaper, it is not really a necessary tool if you have a vertical mill. It is really an "old school" type of machine tool. I had the opportunity to operate an old 20" Cincinnati shaper when I used to work in the machine shops in the ship yards of San Diego. Shapers are actually fun to operate, and when there was a job that would work best on the shaper, everyone wanted to be the one to do it.
This is a little 8"Logan shaper I purchased in the last ten years. I completely took this machine apart, cleaned, painted, lubricated and re-assembled this machine. I guess it was made in the 1960's or 50's. One advantage of shapers over milling machines, is the tooling. Mills require special cutters that require special tools to sharpen. These are great for industry, because time is money, and milling machines are fast at removing metal, if you can afford the tooling. A shaper, uses ordinary HSS steel tools like you would use for turning, on a lathe. The photo on the right shows the tool holder. An interesting thing about the shaper, is that the machine marks left by is are always parallel versus circular as left by a mill. I really enjoy using my shaper, I am always looking for jobs for it to do. It also has an automatic feed which allows me to set it up, turn it on, and then run the lathe or cut something in the band saw. If you are machining up to a shoulder in a shaper, it then requires your full attention. Seeing the parallel machine marks is unique, and can leave a finish like no other machine. My cylinder castings got a lot of machine work on the shaper when squaring things up getting the casting ready for the lathe.

This is my first machine tool I everpurchased. It is a little Unimat 3. I have lots of tooling for this machine including the pillar to mount the head vertically so it can be set up as a drill press or vertical milling machine. In the photo, it is set up as a drill press. I burned up the original motor long ago. This is a new motor unit that someone was offering on Ebay as an exact replacement for the Unimat 3. The replacement motor is even better than the original and has given my little Unimat new life. I still use this machine quite a bit. As a small lathe, it has very high spindle speeds and because it is so small, it allows you to better feel what you are doing versus the large lathe. Most of the valve spindles in my hand operated valves on the Simplex were made on this machine.
This is my rotary table purchased about 20 years ago. It can be used horizontally, or vertically and has a tail stock to be able to index things between centers. It can be used as a rotary table, or, with the index plates, an index head. I used this to space the screw holes on the fire box and the screws on the cylinder heads. The six jaw chuck I got recentlyfor a very reasonable price from Ebay. I had to make a threaded adapter to mount it on the table.
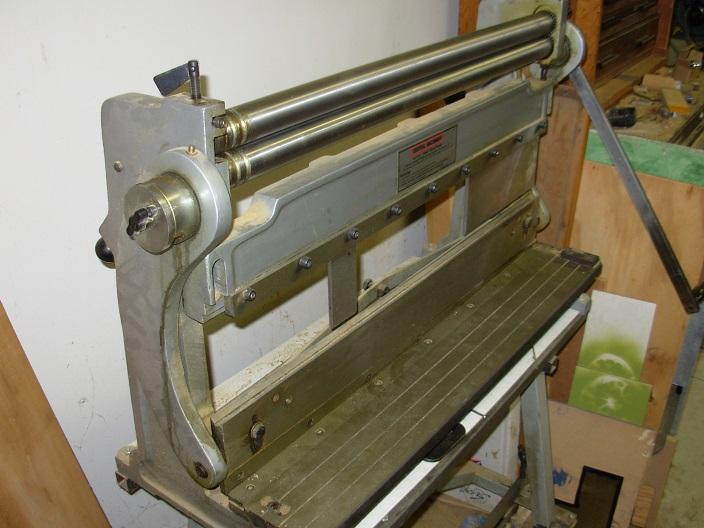
This is one of those 3-in-1 sheet metal tools from Harbor Freight. This machine needed a little adjustment and care to get it working well. I have used all three parts of this machine. I have also adapted several punch and die units that I have made to fit this machine, so, I also use it as a hand operated punch press. The cab roof of the Simplex and the boiler jacket was rolled on this tool.

I have a large disc sander, very handy for quickly shaping things that do not absolutely need to be machined to size. This is a home made sander made by a good friend that passed away several years ago. He made this sander so ithas a control that allows the disc to be rotated in either direction, this really comes in handy so you can sand on either side of the disc.
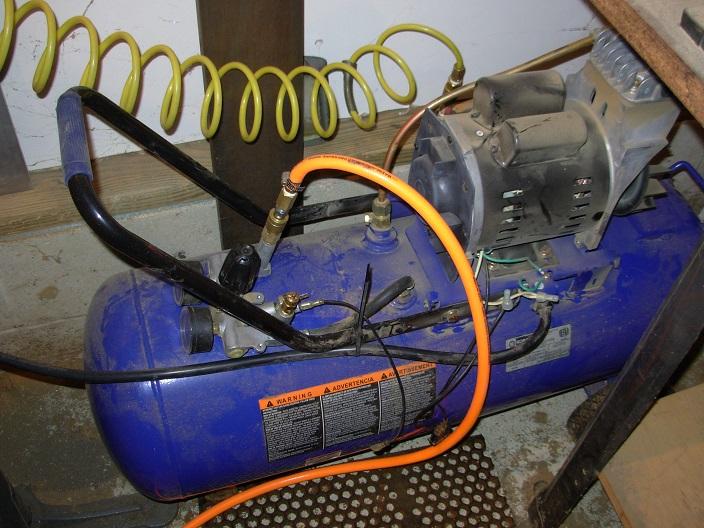
The air compressor gets used all the time, cleaning out holes and getting chips out of freshly cut threads. Also, you need it for a supply to test the locomotive chassis on air!

Here's a few more handy things to have. On the left is a cabinet of drawers that I made in the last year or two. Since the parts for the drawers are so small, it was almost entirely made from scrap wood. Because of the locomotive project, I really to started to collect many different sizes of threaded fasteners. The organization of these was getting out of control. I searched the plastic types of "boxes of drawers", but, most of them allowed only one bin, or, at the most, two bins per drawer. I needed about four bins per drawer, as quantities of 50 of some of my very small fasteners, take up very little space. So, I broke down, and designed and built my own "box of drawers". These drawers have four bins each which allows this cabinet to have 192 bins in 48 drawers. (It's not quite filled yet!)
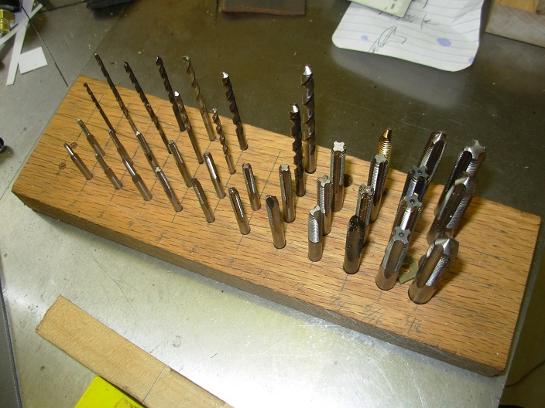
On the right is my tap and drill stand. It holds all the common thread sizes from #1 to 3/8". The stand is set up so the plug tap is in front, then the bottoming tap. The drills are the tap size and the body size. It is possible to look these up and pull from your drill stand or index for the correct drill, but, this is so much easier. My special taps are in a drawer in a tool box along with their correct drills.
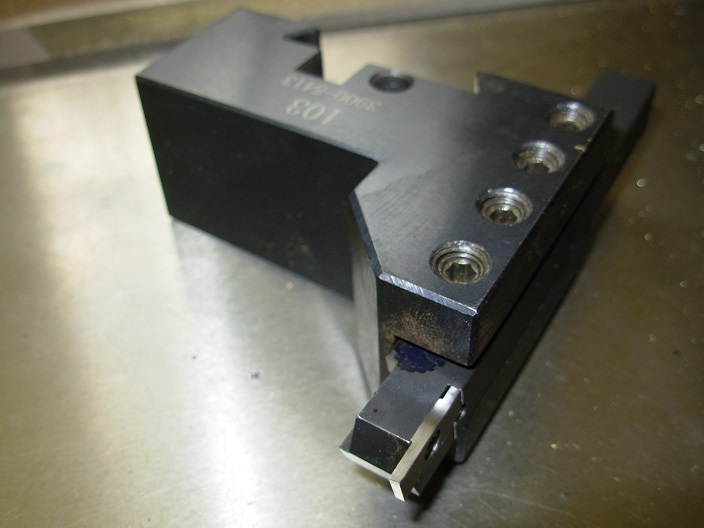
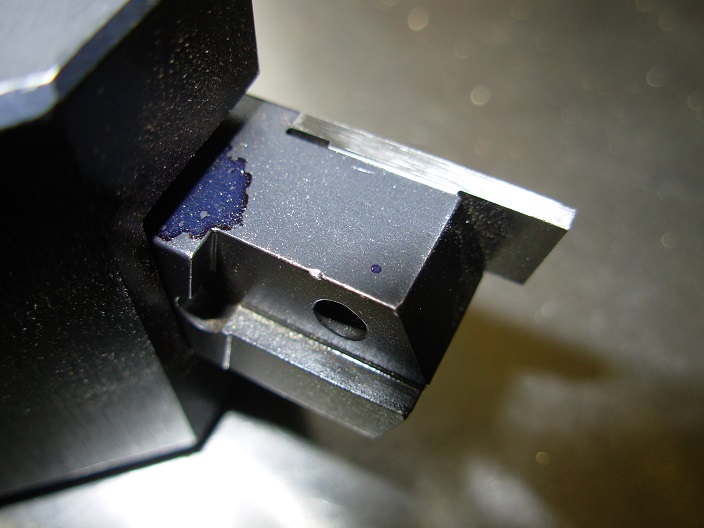

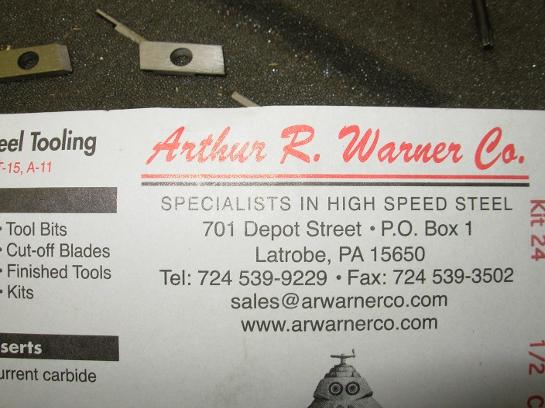
I do not use carbide insert tools, in general, they cost too much. They are good for industry, but expensive for the hobbyist. I do make one exception to insert tooling, there is a company that makes high speed insert tooling. They are the only one I know of, they are the Arthur Warner Co. HSS tooling will, in general, leave a better finish than carbide. They have an entire line of HSS insert holders. I have one of their HSS insert tool holders for grooving and threading. This tool is well worth the money. Of the four photos above, the first is the grooving tool in one of my quick change holders. I always have this holder ready to go. The second photo is of the business end of the holder. The holder is made so it can take left or right hand inserts. The third photo shows a grooving insert next to a threading insert. These are great for quickly setting up and single point threading on the lathe. To a certain degree, the HSS inserts are sharpen-able. You can rub the top flat part of the insert on a stone and give it a new edge. The fourth photo gives you contact information for them as well as their website address.
When I do need carbide tooling, like for dealing with cast iron, I use brazed carbide tools. I have a special "green wheel" so I can sharpen these off hand using a regular tool grinder.
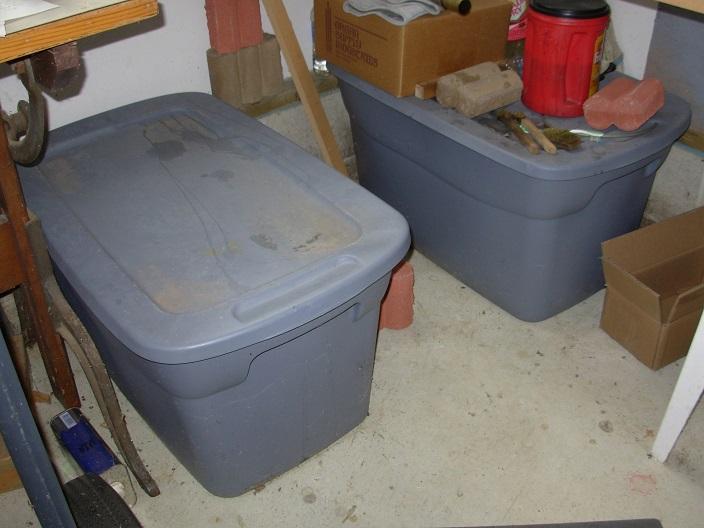
Not exactly tooling, but, these are the acid and fresh water baths for cleaning copper that has been silver soldered. I bought these plastic bins from Walmart. The bin on the right is the acid bath and the one on the left has fresh water. Traditionally, the acid for cleaning copper is sulfuric acid, which is basically battery acid like found in a car battery. Another acid, but much safer, is citric acid. You can find it at agrocery store and is used for canning. It is a food product and is completely safe, that is to say, it won't eat holes in your clothes and the fumes will not rust your nearby tools. Sulfuric acid will though. You can also put your hands right in the solution without fear, if you have any cuts or abrasions on your hands, it will let you know about them! Citric acid is probably not as aggressive as sulfuric acid, but, if you are willing to let a part soak overnight, or for a few hours, it works just as well as is so much safer. The cleaning on my copper boiler between soldering events, was done entirely with citric acid.
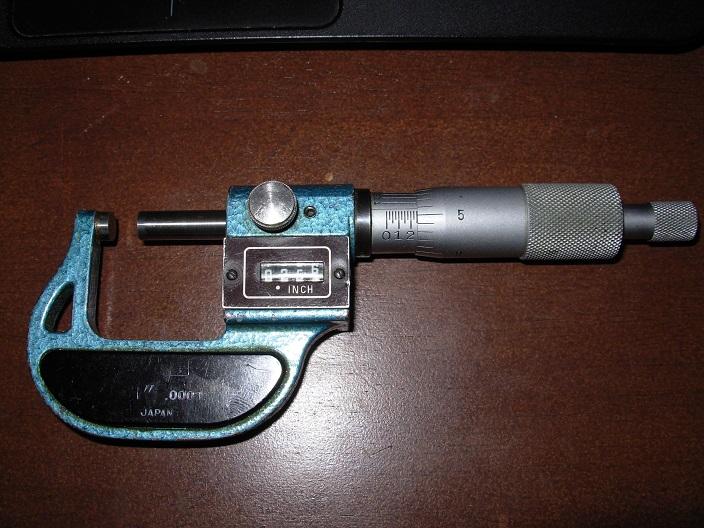
This is one of my good micrometers, it is made by Fowler. Calipers, dial, digital, or vernier, are good for more casual measuring. Accurate measuring is done with a micrometer. This is a digital, mechanical micrometer. The little window has numbered wheels behind it like the old style odometer on an automobile. There are gears that drive the wheels from the thimble of the mic. It has polished carbide faces and has a vernier scale that allows measurement to the fourth decimal place. For accurate interference and clearance fits, you need some sort of traditional mic. A digital micrometer is okay, but, the one above will never have a low battery, as there is no battery! I have this sort of mic up to 4 inches. For most miniature locomotive work, up to 2 inches is probably enough. For measurements larger than this, some sort of caliper is okay, unless you are looking for accurate fits at dimensions larger than 2 inches.